Home
Brewing with Mr Beer
They say a picture is
worth a thousand words....
I have put together
this photo essay to share my modified execution of the Mr Beer brewing
process. I am not by any means an experienced brewer, and I hope that by showing
you how basic
my brewing is, you'll see that anyone can do it with a minimum of hassle and
expense.
Mixing the Batch
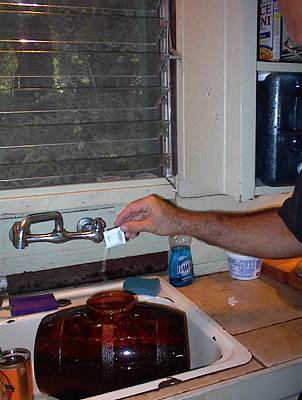
 The
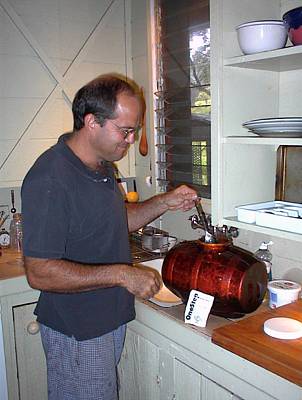
picture on the right shows me in our little kitchen, mixing
up a batch of One-Step sanitizer in the keg. I place my mixing spoon in to
sanitize it as well. I mix one gallon of warm water with one half package (1
Tablespoon) of One-Step per the directions.
The
picture on the right shows me in our little kitchen, mixing
up a batch of One-Step sanitizer in the keg. I place my mixing spoon in to
sanitize it as well. I mix one gallon of warm water with one half package (1
Tablespoon) of One-Step per the directions.
 In
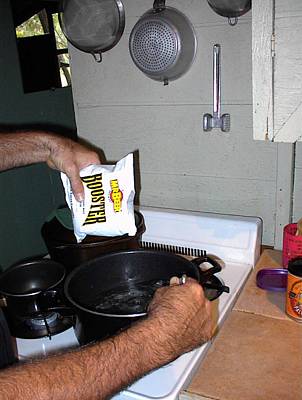
go the ingredients according to the recipe. Here I am assembling a batch of
"Pineapple Perfection" to satisfy my curiosity. Remember that if
you are using booster, to mix it in slowly before you heat the water to avoid a
big clump! I am using a 3 quart pot that I sanitized with the sanitizer I ran
through the keg in the preceding step.
In
go the ingredients according to the recipe. Here I am assembling a batch of
"Pineapple Perfection" to satisfy my curiosity. Remember that if
you are using booster, to mix it in slowly before you heat the water to avoid a
big clump! I am using a 3 quart pot that I sanitized with the sanitizer I ran
through the keg in the preceding step.
 Here
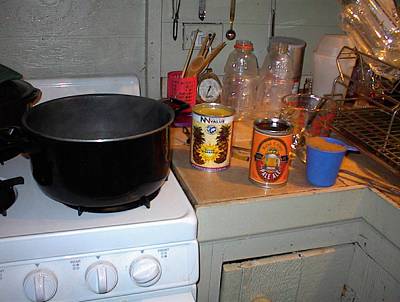
I have set out the remaining ingredients for this batch; a can of sliced
pineapple, a can of West Coast Pale Ale, and one cup of brown sugar. I use a
Pyrex measuring cup that I sanitized to pour the water into the pot as well as
to hold my sanitized stirring spoon.
Here
I have set out the remaining ingredients for this batch; a can of sliced
pineapple, a can of West Coast Pale Ale, and one cup of brown sugar. I use a
Pyrex measuring cup that I sanitized to pour the water into the pot as well as
to hold my sanitized stirring spoon.
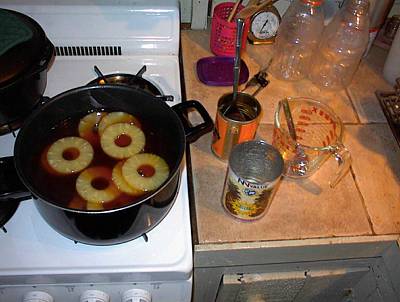 MMMMMMMMMMM!
Doesn't THAT look yummy? I am allowing the pineapple to steep in the hot wort
for five minutes, according to the recipe. I then will pour the whole works into
the keg .... over the sink of course
MMMMMMMMMMM!
Doesn't THAT look yummy? I am allowing the pineapple to steep in the hot wort
for five minutes, according to the recipe. I then will pour the whole works into
the keg .... over the sink of course
 Don't
forget to add the yeast, let it sit for five minutes, and then stir it up real
good with a sanitized spoon.
Don't
forget to add the yeast, let it sit for five minutes, and then stir it up real
good with a sanitized spoon.
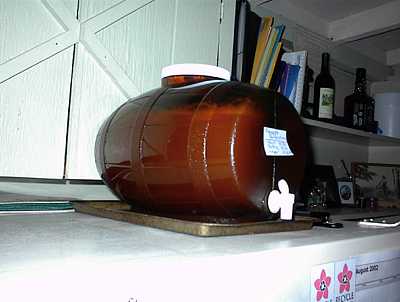 And
VOILA, here's the batch sitting on top of my fridge with a containment vessel
(baking pan) underneath, just in case the ferment gets a little too
rambunctious. I have only experienced overflow once, with a batch of Love Potion
Lager. Those fruit beers really get a rolling ferment going!
And
VOILA, here's the batch sitting on top of my fridge with a containment vessel
(baking pan) underneath, just in case the ferment gets a little too
rambunctious. I have only experienced overflow once, with a batch of Love Potion
Lager. Those fruit beers really get a rolling ferment going!
Bottling the Brew
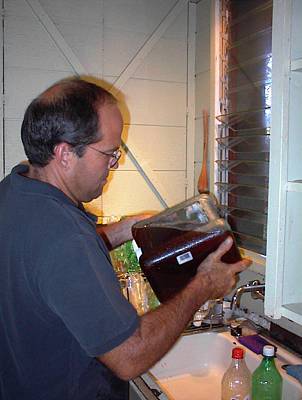
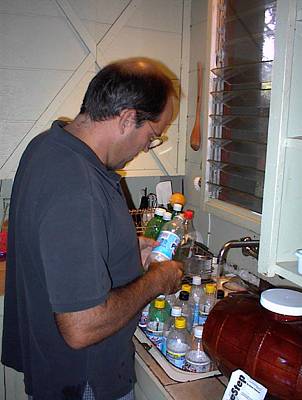 I
reuse PET soda bottles that I get from my friend Shaun. I strip off the labels
and rinse them out with water to remove the residual soda in them. Since these
bottles are clear in color, I make sure to keep them in a cardboard box after
bottling to prevent damage to the beer from direct light. I have reused some
bottles and their caps four times already with no problems. Here I start the
bottling process on a batch of Love Potion Lager.
I
reuse PET soda bottles that I get from my friend Shaun. I strip off the labels
and rinse them out with water to remove the residual soda in them. Since these
bottles are clear in color, I make sure to keep them in a cardboard box after
bottling to prevent damage to the beer from direct light. I have reused some
bottles and their caps four times already with no problems. Here I start the
bottling process on a batch of Love Potion Lager.
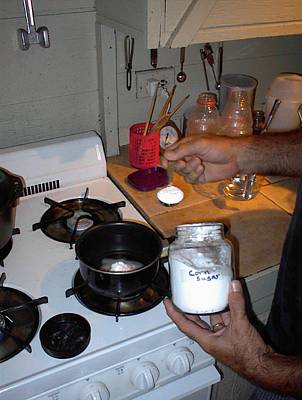 I
use 6 Tablespoons of corn sugar to prime the batch. I mix it in about
1/2 cup of water in a pan than I rinsed with a little sanitizer from the keg. I
have used regular white sugar as well as turbinado (unrefined) sugar for priming
and can detect no difference in the taste of the final product. I will likely
return to using the turbinado sugar we keep in the house once my supply of corn
sugar is gone.
I
use 6 Tablespoons of corn sugar to prime the batch. I mix it in about
1/2 cup of water in a pan than I rinsed with a little sanitizer from the keg. I
have used regular white sugar as well as turbinado (unrefined) sugar for priming
and can detect no difference in the taste of the final product. I will likely
return to using the turbinado sugar we keep in the house once my supply of corn
sugar is gone.
 Here's
a shot of the batch priming and bottling setup I learned from a post on the Mr
Beer Brewing Club group on Yahoo. I bought a 2 gallon water bottle at
Safeway for about 8 dollars and use it as a batch priming vessel after running
some sanitizer through it and the hose. The hose was purchased at the local
hardware store. It is three feet long with an inner diameter of 1/2 inch.
Here's
a shot of the batch priming and bottling setup I learned from a post on the Mr
Beer Brewing Club group on Yahoo. I bought a 2 gallon water bottle at
Safeway for about 8 dollars and use it as a batch priming vessel after running
some sanitizer through it and the hose. The hose was purchased at the local
hardware store. It is three feet long with an inner diameter of 1/2 inch.
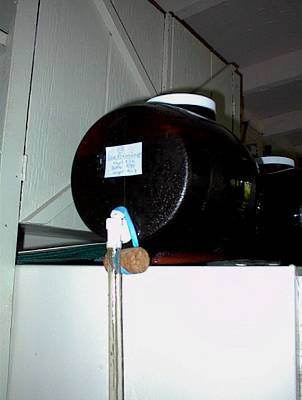 Here's
a close-up of the cork and rubber band I use to hold the spigot open on the keg
so I don't have to stand there and hold it while it drains into the priming
vessel. Hi-Tech huh? You can also see the sticky note I affix to each batch with
the name of the beer, the batch number, the start date, the bottle date, and the
lager date. This sticky note travels with the batch from keg to box of bottles
to the front of my refrigerator while lagering.
Here's
a close-up of the cork and rubber band I use to hold the spigot open on the keg
so I don't have to stand there and hold it while it drains into the priming
vessel. Hi-Tech huh? You can also see the sticky note I affix to each batch with
the name of the beer, the batch number, the start date, the bottle date, and the
lager date. This sticky note travels with the batch from keg to box of bottles
to the front of my refrigerator while lagering.
Now I've added the
priming sugar solution and am making sure it gets evenly distributed through the
beer by gently rolling the priming vessel around a few times....with the lid on
of course!
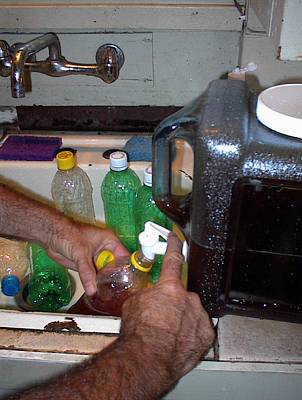 Filling
the bottles out of the priming vessel is a snap. I loosen the top so that air is
allowed into the vessel to allow a free flow of beer. I do this over the sink so
that clean up is a breeze. After filling each bottle, I screw the cap on tight,
rinse off the bottles, and dry them with a towel.
Filling
the bottles out of the priming vessel is a snap. I loosen the top so that air is
allowed into the vessel to allow a free flow of beer. I do this over the sink so
that clean up is a breeze. After filling each bottle, I screw the cap on tight,
rinse off the bottles, and dry them with a towel.
 I
then put the batch of bottles in a reusable cardboard box, put a batch number on
each cap written with a marker on a piece of removable scotch tape, affix the
sticky note, and set them aside for at least two weeks of fermentation.
I
then put the batch of bottles in a reusable cardboard box, put a batch number on
each cap written with a marker on a piece of removable scotch tape, affix the
sticky note, and set them aside for at least two weeks of fermentation.
Tasting the Results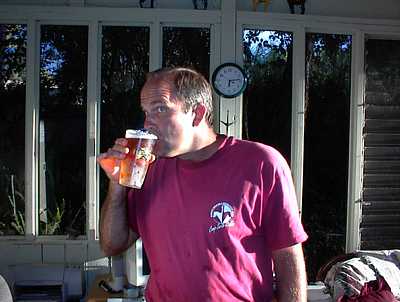
The proof of the
process is, of course, in the tasting. I keep pint glasses in the freezer at all
times. This way, when it's "beer thirty" at our house, I can dive
right in!
I hope that this photo
essay helps you to see just how easy making your own home brew can be, with the
help of Mr Beer that is!